Introduce tu búsqueda a continuación y presiona el botón para obtener resultados.


The Instituto Tecnológico de Aragón, hereinafter ITA, has both the Corporate digital certificate of Camerfirma (eIDAS qualified certification authority) and the electronic certificate of the Fábrica Nacional de Moneda y Timbre (FNMT) and issues corporate documentation (technical reports, orders, invoices, etc.) digitally signed with one of these two types of certificates.
This guide describes how to make Adobe Reader or Adobe Acrobat applications recognize the digital signature of PDF documents.
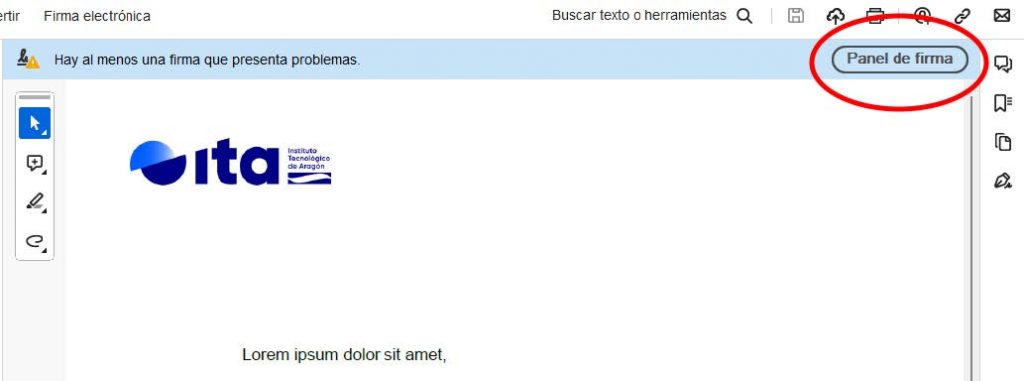
If when you open the PDF with your Adobe Reader program, the message “There is at least one signature with problems” appears in the upper margin, it is because your program does not recognize the Certificate Authority that issued the certificate. In this case, it can be the FNMT or Camerfirma. To solve this, it is only necessary to configure Adobe Reader the first time to recognize the sender.
To do so, click on the “Signature Panel” button:
Where a block with the different digital signatures contained in that document will be opened.
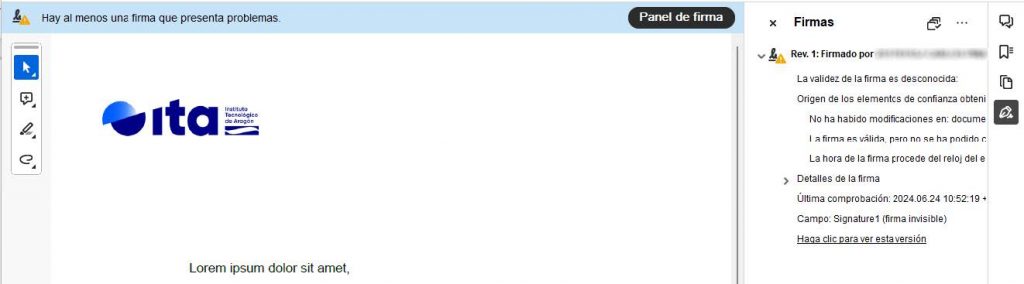
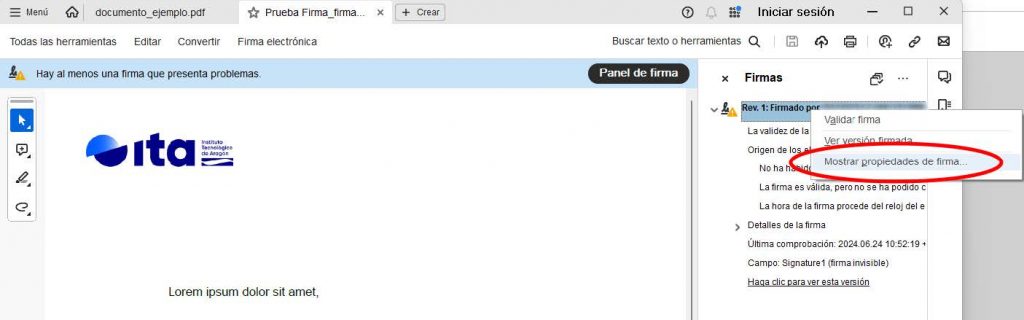
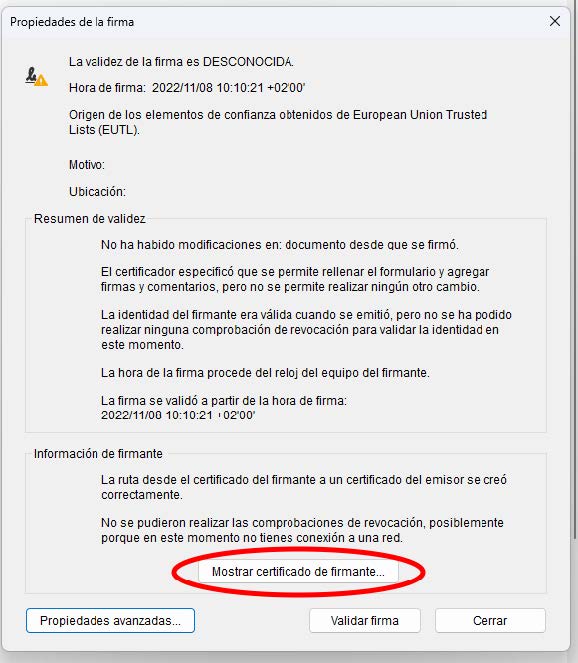
Once the signature panel is accessible and the signatures are displayed, right-click on the signature giving problems and select “Show signature properties”.
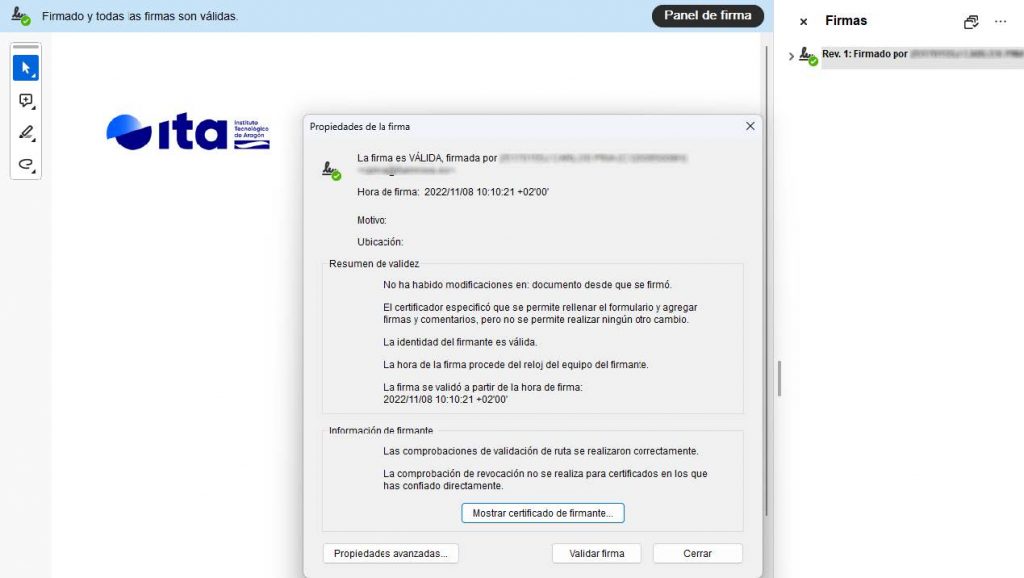
A window with the PDF Electronic Signature Properties will open. Click on the “Show Signer’s Certificate” button to verify the digital signature data.
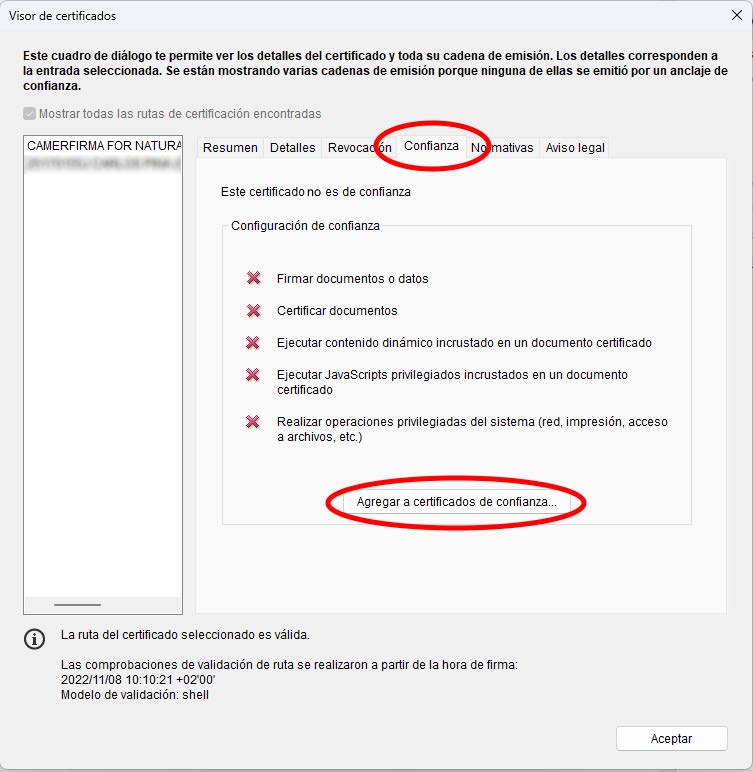
Clicking on it will open the “Certificate Viewer” which allows you to view the details of the certificate and its entire issuance chain. On the left we see the issuer and the details of the certificate; we select it by clicking on the name and open the “Trust” tab. In this tab the message “This certificate is not trusted” appears. If all the data are confirmed, click on “Add to trusted certificates”.
Adobe Reader may display an alert message after clicking the above button. We proceed to click on “Accept” to make the change of trust configuration.

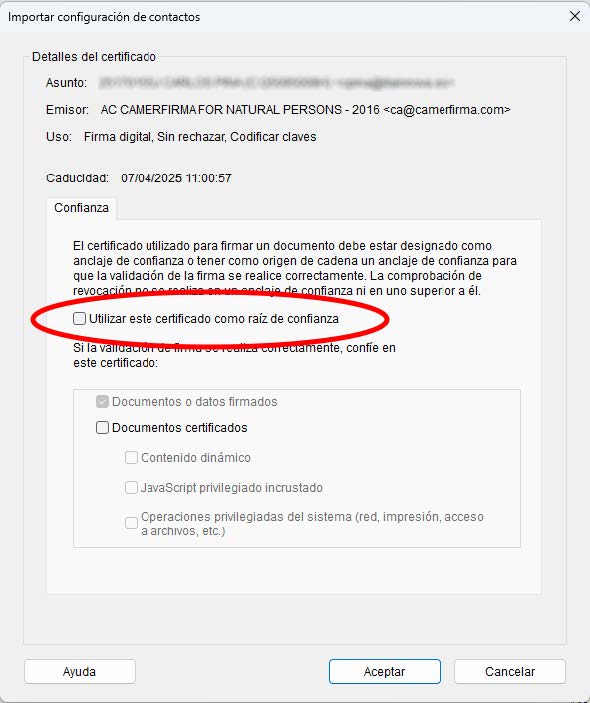
Once this is done, the “Import contact settings” window will open. In the “Trust” tab, select the “Use this certificate as trusted root” option, leave the “Certified documents” option UNCHECKED and click “OK” in the following windows that appear.
Then close the “Certificate Viewer” dialog with the “OK” button and go back to the “Signature Properties” window, where the “Validate signature” button is clicked.

From this moment on, Adobe Reader will automatically recognize the signature of the document and the rest of the documents that are signed by Camerfirma or FNMT, depending on the signature that has been validated: